Amongst the madness of Covid 19, I wanted to share some tips to help people improve their own websites. Compressing your images may not be something that you’ve ever really thought about but it’s an incredibly useful way of reducing the loading time of your website.
Compressing an image simply means reducing the file size of the image.
Think of your website like a suitcase for your holiday (maybe not the best example during a pandemic but it’s the only one I can think of right now). An uncompressed image is a 2L tube of toothpaste, and a compressed image is a travel-sized one. They do the same thing, and you don’t need 2L of toothpaste for your weekend in the costa del sol.
A smaller image size, without compromising on quality, will reduce the ‘weight’ of your website overall. And, because there is less weight to your website, it can be loaded quicker.
Why is page loading speed important?
Studies have shown that when page load speed increases the bounce rate also increases. This study shows that the bounce rate soars, to 38% by the time it hits 5 seconds! And, there are countless other stats and studies online that also support this claim.
Page loading speed is one of the factors that is considered by Google when ranking your website. This is because a lot of the search engine ranking factors these days really come down to the usability of your website and the experience for the end-user. And, if your website loads slowly that does not provide a good experience for the user.
So, three main reasons:
- A fast website is a better website for your end-user
- A slow website will make people leave
- A slow website will be ranked worse on search engines
Before moving forward with image compression it’s a good idea to test the speed that your website loads. The Pingdom website is a great tool for this. You can test your website here. If you scroll down on the test you can see the size of space on your website that your images take up. This can give you a good idea of where to start first with speeding up your website.
How to compress images for your website
I’m going to walk you through two ways to do this: compressing an image with Photoshop and compressing an image without Photoshop (scroll down for this one!).
Firstly, it’s important to note that some file types are larger than others. Here are a few quick thoughts on the subject:
- JPEG is smaller than a PNG: This is because a JPEG loses information when it compresses and a PNG doesn’t. JPEG images are fine for your website, you can save a larger PNG version of the picture on your computer for future use too.
- JPEG’s can’t have transparent backgrounds. If you want a transparent background you will need to use a PNG, GIF, SVG
- SVG’s are smaller than GIF’s or PNG’s, and work well for icons and shapes on your website
- GIF’s don’t support as many colour channels as PNG’s, and are generally used for animation. Generally speaking, use a GIF when animating, and a PNG or SVG for a transparent background.
Compressing an image with Photoshop
Photoshop is a specialist tool and I respect that not everyone has or wants access to this software, below this section I go into detail with information on how to compress an image without Photoshop. If you don’t have this software just scroll down for all the information!
That being said, I use Photoshop and am able to share my easy step-by-step for compressing an image for your website.
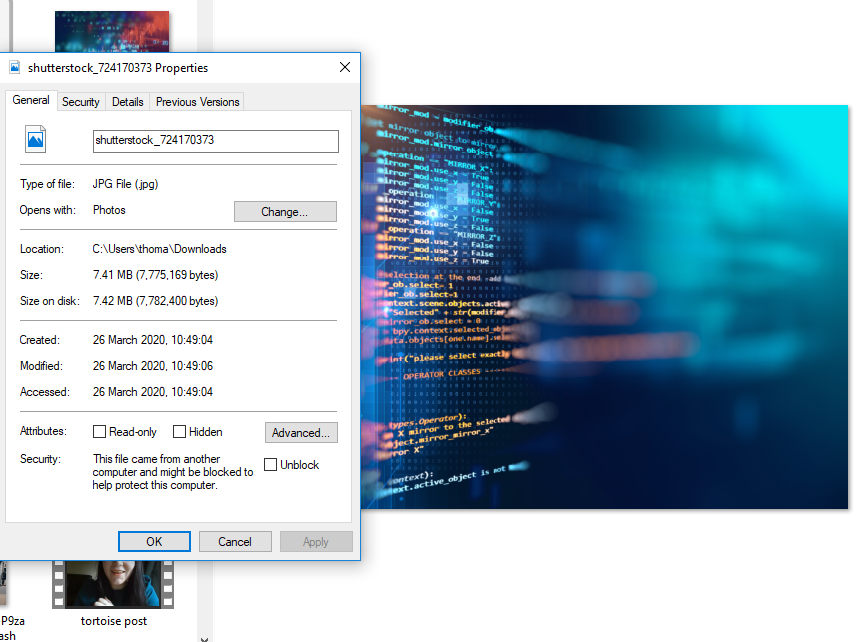
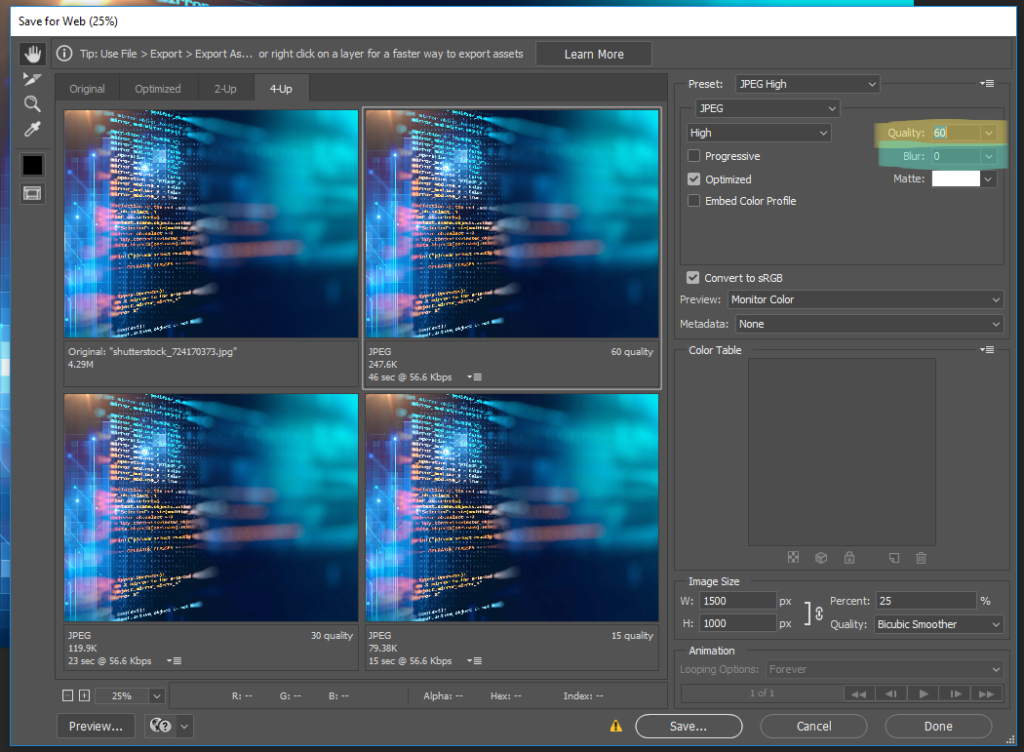
This image starts out as 7.41mb and we manage to reduce the size to just 247.6kb which is a reduction of approximately – 96.65%
I’m going to list out the instructions and then post some images below to help show where things are.
- Firstly, open up the image in photoshop
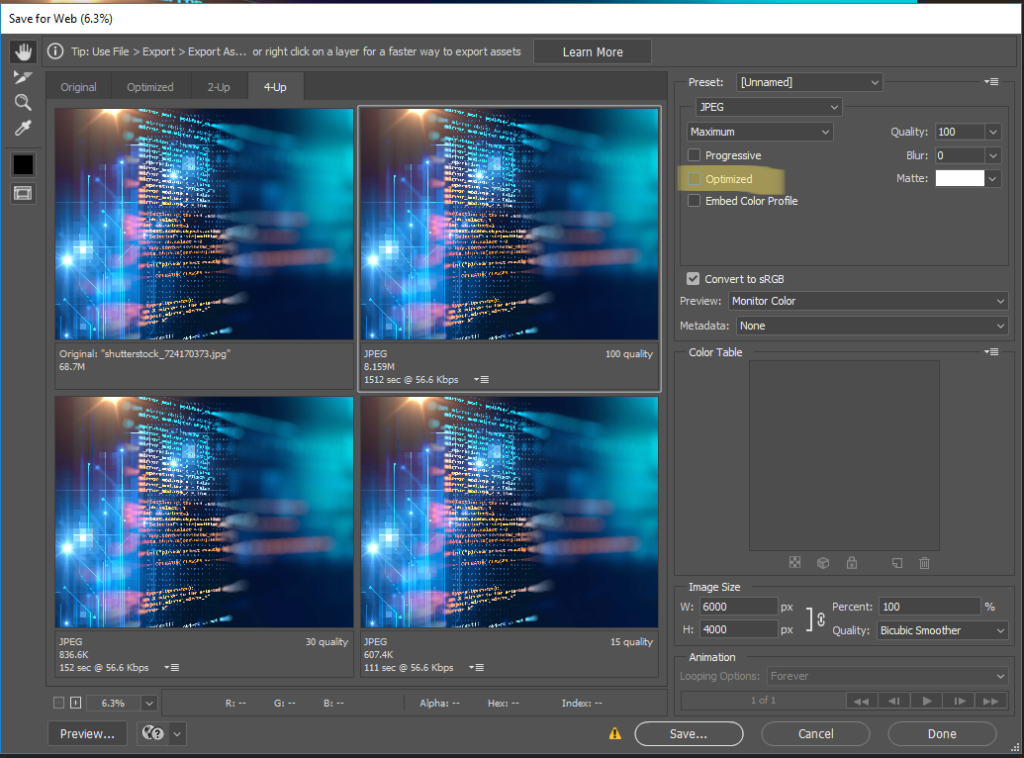
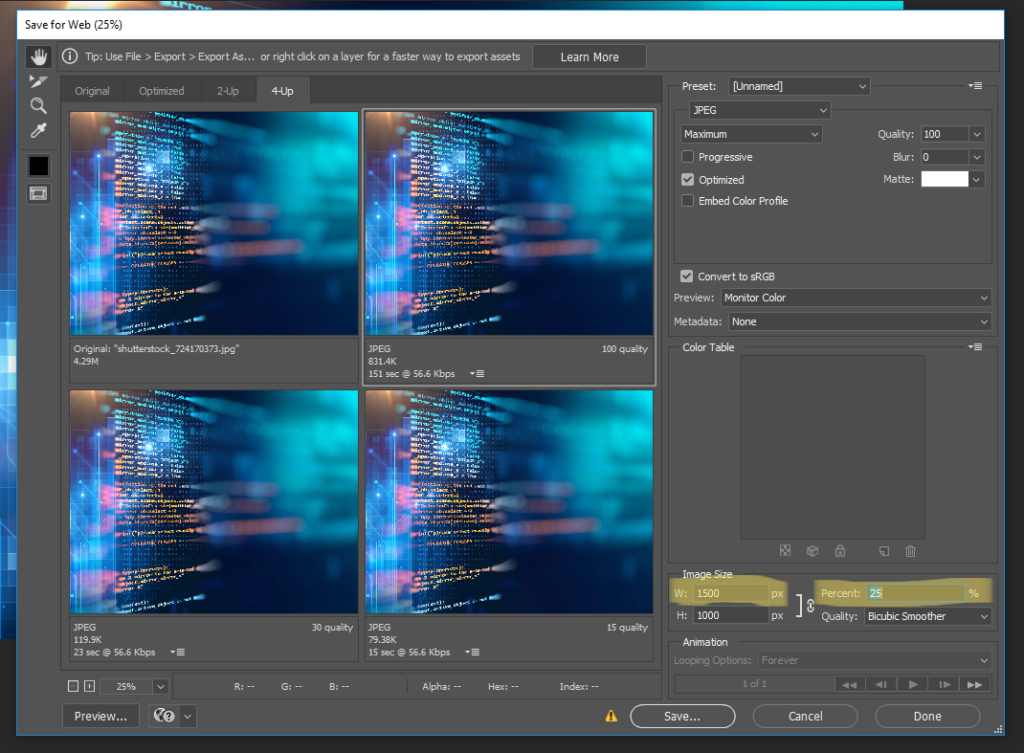
- Go to File > Export > Save for Web
- Tick the ‘optimized’ box
- Reduce the width and height of the image (hero images can be 1500px-2000px wide for a website, and still look brilliant, smaller images on a website never need to be bigger than 800px)
- Reduce the ‘quality’ of the compression. You can usually go down to 60 and still maintain an image that looks as high quality to the eye.
- (Optional) If the image doesn’t need to be crisp, you can always play around with the blur option to reduce file size.
- (Optional) Before saving click ’embed colour profile’, this is useful for email marketing as email clients can get confused about the colour profile of an image, some people will use this for their website images as well. If you upload the image and the colours are not correct on your website, return to this stage and click ’embed colour profile’.
- Click save!

Compressing an image without Photoshop
If you do not have Photoshop there are still many options for how to compress and image for your website. There is a handy free software called Gimp, which is a great place to start with image editing and a great way that you can re-size and compress your images for free. Here are some useful links to articles explaining how to compress an image in different software:
- Gimp: How to compress an image in Gimp
- Use an online image compressor: This link lists 14 of the best available online
- Ms Paint: You can resize an image in paint and then use one of the compression tools listed above or follow the instructions below for Optimizilla
- Affinity: How to optimise an image in affinity
- Canva: How to optimise an image in Canva
Best online tool: Optimizilla
I’ve chosen this one because it is super easy to use and allows you to compress the image down to a nice small size. You should still re-size your image before uploading for compression to get the best results.
So, this image starts out at a size of 7.41 MB. Which is too large!

We run it through Optimizilla and reduce the file size to just 859Kb which is a reduction of 89%.
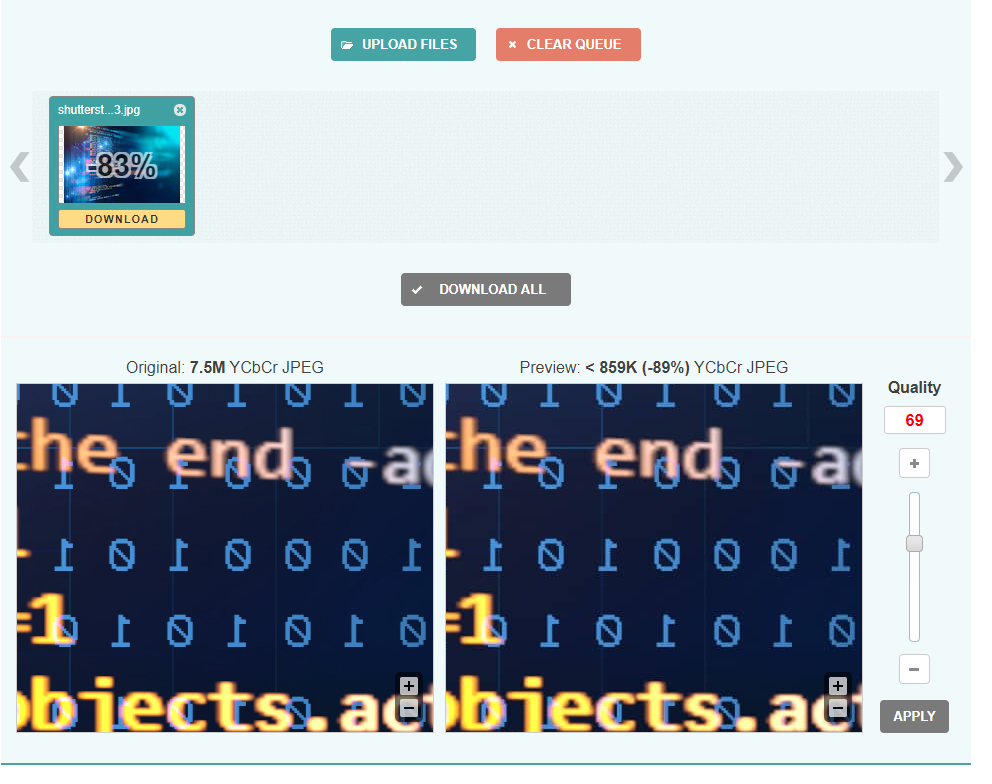
Once you have uploaded your image in this image compression software, there is then a sliding bar at the side where you can define the quality of the image. The higher the quality the larger the file is. Generally speaking, you can bring this quality down to somewhere within 60-70 to still have an image that looks just as good to the naked eye.
Once you have chosen your quality level, click Apply, and download the image for your use on your website.
To sum up: Compressing images for your website
Compressing your images will make your website run a little bit faster, and is one of the things that website designers should do as they are building your website. For people that are new to website design, or if you built your website yourself, it’s an easy thing to overlook but an equally easy thing to go back through and fix. Using the methods above you can reduce the sizes of images on your website and hopefully increase your page load speed.