So many business owners set up an e-commerce store with great intentions only to find that they have no idea how to photograph their online shop on their limited budget. Good product photography is more important than you might realise.
This particular blog is guest-written by Natalie Bacon, she has a degree in Photography, is an awesome photographer and retoucher, and has experience in e-commerce. Seemed like a no-brainer getting her to do this one!
Why good product photography is important
We all love to window shop, but would you ever buy a product without seeing it first? Of course not. Good photography is essential for any online e-commerce website because a good-looking product could ensure that your products are chosen over competitors.
Your e-commerce website is your customer’s virtual shopping experience. You need to provide clear, eye-catching photos to gain trust from your customers and spark in them that ‘desire to buy’.
Still not sure? According to a 2018 survey by Weebly.com, over 75% of respondents agreed that product photos are very influential when buying a product.
The good, the bad, and the what the hell is that
Do you know what drives over 20% of online sales returns? Inaccurately represented products (this is from that Weebly survey too!). There is nothing more disappointing to a customer than thinking they are buying one thing, only to receive something else.
Good photography that perfectly represents each of your products ensures your customers will trust your e-commerce brand and happily pay for the amazing items you are selling.
Professional VS. DIY
The easiest way to ensure all your products look fantastic online is to hire a professional photographer. Good product photographers will know how to draw attention, attract customers and shoot your products in an exciting and visually appealing way.
Photographers will also be able to provide imaginative ‘lifestyle photography’, which is a fancy way of saying ‘photographs of people doing things’. Lifestyle photography can be great as it can help customers imagine themselves using your product.
Professionals will also ensure that each photo correctly matches how your item looks online to offline and can provide colour matching and retouching services that take years to really perfect.
Though, it is understandable that not everyone has the budget to invest in professional photography, especially when you’re just starting your new e-commerce company. This guide is for people in this category who want to do it themselves, but in the best possible way for the lowest price.
Although, that being said, once your business takes off investing in good product photography can really pay-off in the long term.
Step By Step: Photographing your online shop on a budget
What you will need to get started:
- A digital camera (a good quality phone camera can work but be sure to check the images out on your computer to see how they would look on a website)
- A large roll/sheet of white paper or card (I’ve used A2 white card from WHSmiths, you can use other colours as well but white is a good place to start!)
- A chair or table
- Sunlight (or a large lamp, but natural light works best on a budget)
- Tape to keep your white paper/card in place
Here are the steps you need to take to set up your photoshoot:
- Firstly, take your large sheet of card and rest this against a chair to form a curved shape, then tape or peg this to secure it. You can also create a curved shape with a table and a wall.
- Face the white backdrop towards the sun or your chosen source of light. It’s great to do this in a driveway, garden, or a park to get the full effect of the natural light. If you’re doing this inside make sure you close all of your curtains and turn off every other light except for the main light source.
- Place your product in the centre of the base of your backdrop. Ensure that it is not touching the back of your card and creating a crease.
- Photograph your product making sure to not stand directly in front of your chosen light source.
Your set up should end up looking something like this!

Photographing products on a budget: What to keep in mind
Do make sure to check your camera settings.
The best thing you can do is make sure that your ‘white balance’ settings are correct. There’s absolutely nothing worse than thinking you’ve taken some truly smashing pictures only to find out they are all blue!
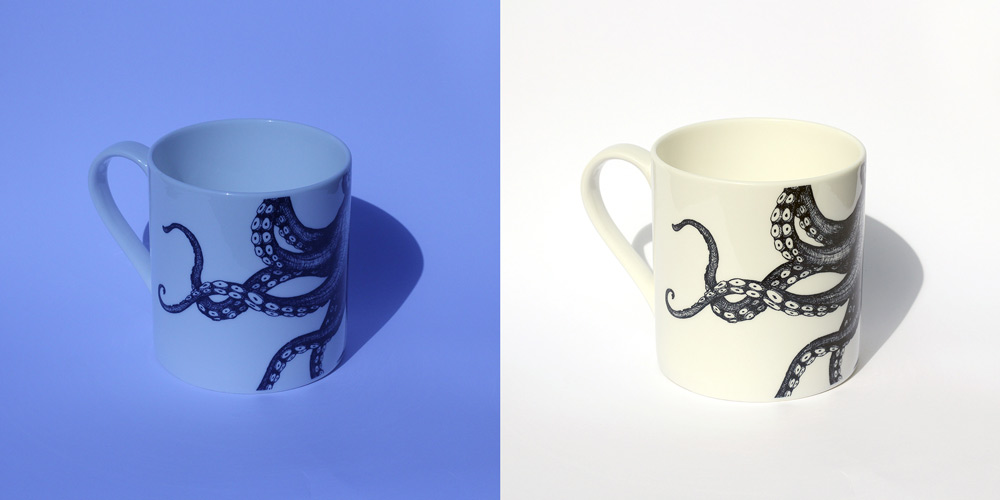
Most digital cameras will do this on their automatic setting, but you can make sure by heading over to your menu settings on your camera. There will be a section called ‘white balance’ with a few different options. Here’s what to keep in mind.
- If you’re photographing outside: Make sure to select the ‘daylight’ or ‘cloudy’ setting
- If you’re photographing inside: Make sure to select the ‘tungsten’ or ‘indoor’ setting
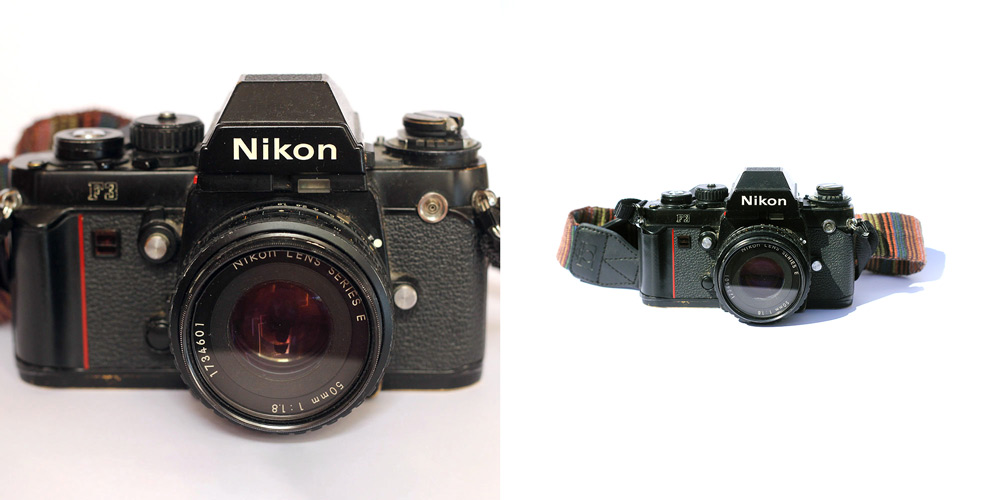
Don’t shoot too close!
While it may look great on your camera, shooting your images too close will make it harder for your website designer to crop to the correct size later on. My tip would be to shoot a little further away than you think – don’t worry if you see some of the edges of your backdrop as this can easily be cropped out later on.
Do photograph each item separately
Group shots of products do look great, but you’ll want at least a couple of each product individually. Otherwise you may risk confusing your customers about what they are actually buying.
Don’t make the images too busy
A few simple photographs of each product on a plain background looks professional and clean and is perfect for your online store.
Do shoot at least 5 images per product
Variety is key for e-commerce photography, as this also lets your customer see every detail of your amazing products. My tip would be to photograph at least one image of the front and back and include a few detailed shots of varying angles.
After the photoshoot: Next steps
Now I’ve convinced you of product photography’s power (and you have some amazing photos), the next step would be to edit your images. You can do this simply by adjusting the brightness and contrast of the photo and cropping it, but more advanced retouching can make your products look even better
Not only this, but you will also need to make sure your images are correctly sized and compressed for use on your website. Hopefully, this guide has given you some valuable practical advice on exactly how to photograph your online shop on a budget, so that your products look fantastic!
A quick word from the Author
Hi everyone! Hope you’ve enjoyed my blog – my name’s Natalie and I’m a professional photographer and retoucher based in London. I have a vast amount of photography experience and have worked with brands big and small to ensure every product, person and event look its best. Check out my website if you want to see more!